
When you use Simple Growth Automations that send email, they use Keap's email servers to send emails to your leads and clients on your behalf. They typically use the Email domain found in your Keap instance under Settings->Business Profile->Contact Details->Business email as seen below:
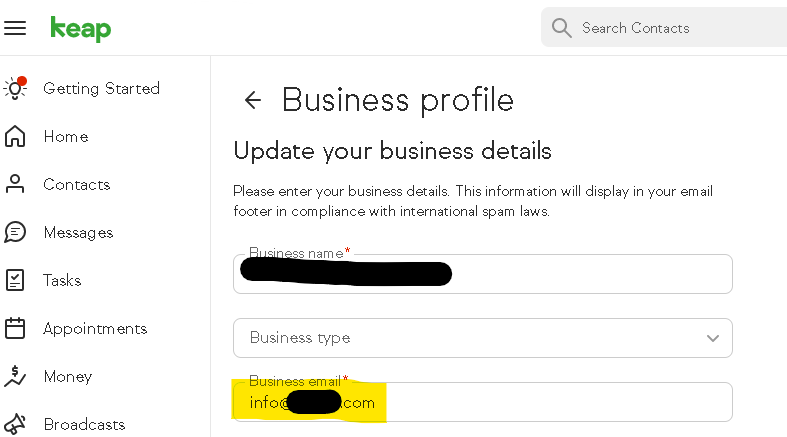
Keap then uses that address as the From: address for emails sent to contacts.
Modern email systems try to protect their users from SPAM. To make sure your email coming from the Keap Email servers is not considered SPAM, you need to add Keap's Email Servers to your business DNS domain in a Sender Policy Framework (SPF) record so that they are allowed to send on your behalf. It also uses a DomainKeys Identified Mail (DKIM) record to secure the email envelope, providing further assurance that email coming from Keap is legitimate and not SPAM.
You can get SPF and DKIM added to your domain's DNS by doing the following steps.
SETTING UP SPF
- Check your DNS domain to see if you already have an SPF record set up
- Open a web browser to https://mxtoolbox.com/spf.aspx and fill in your business' DNS domain (e.g. simplegrowthsystems.com for us) and press the [SPF Record Lookup] button
- IF YOU DON'T HAVE AN SPF RECORD, the result will look like this:
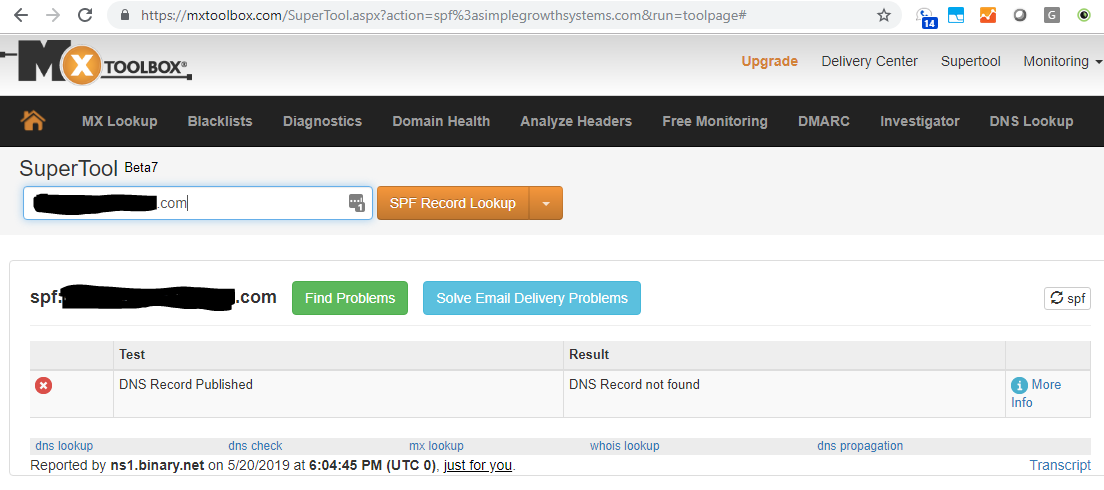
- For NO SPF RECORD, follow these instructions:
- Login to the management pages for your business' DNS domain (e.g. simplegrowthsystems.com for us, managed by GoDaddy)
- Add a new DNS TXT Record
- Use the following line to add a value to the DNS TXT record as a placeholder until you get the specific information for your domain from your vendor:
- v=spf1 a mx include:infusionmail.com -all
- The v=spf1 is required
- The a mx say to use your existing DNS A and MX records to authorize your existing vendor Email Servers to send mail on your behalf.
- When you get your vendor-specific SPF entries, you can replace the a mx entries with those. For example, in the above screenshot, you see 1 include: entry for Microsoft Office 365. Depending on your email vendor(s), you would put SFP information for yours there.
- The include:infusionmail.com entry adds all Keap Email Servers that will be sending mail on your behalf
- The -all tells receiving Email Servers to not accept email from any Email Server not listed in your SPF record. This protects you from SPAMMERS and hackers trying to pretend to be you by sending falsified email from their servers.
- Save the DNS TXT record
- DNS changes can take up to 48 hours to be noticed by all the DNS servers on the Internet, so you may have to wait a bit for the changes to take effect.
- IF YOU DON'T HAVE AN SPF RECORD, the result will look like this:
- IF YOU DO HAVE AN SPF RECORD, but don't have Keap's servers listed, it may look like this:
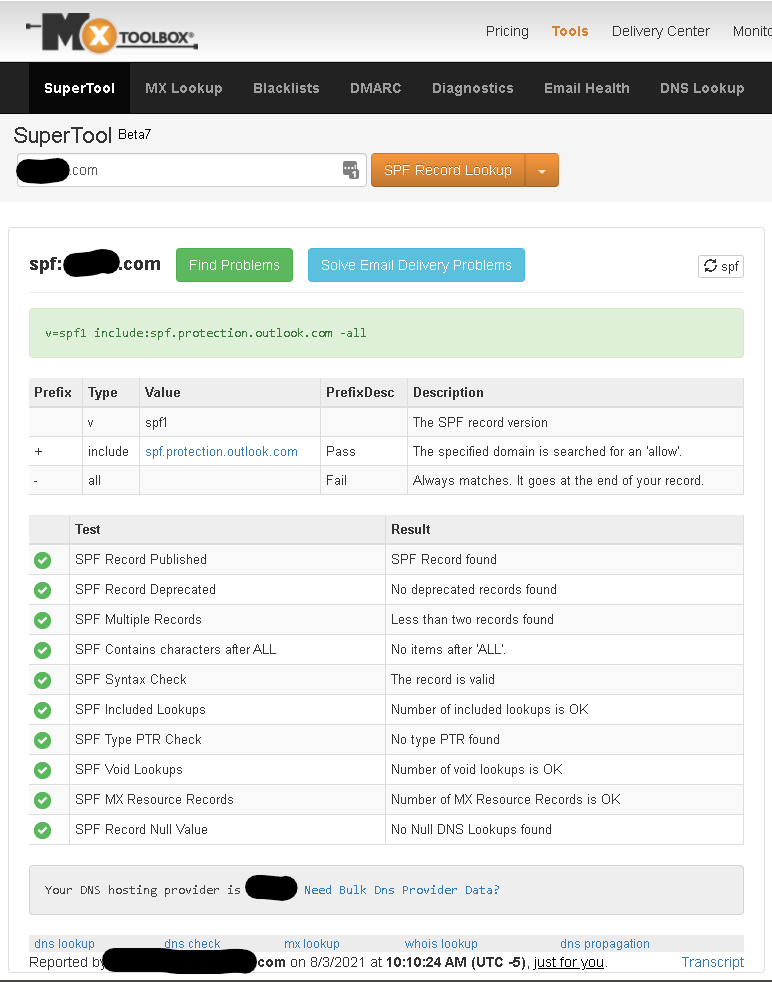
- For an EXISTING SPF RECORD, follow these instructions:
- Login to the management pages for your business' DNS domain (e.g. simplegrowthsystems.com for us, managed by GoDaddy)
- Edit the DNS TXT record with v=spf1 in it to add the following in BOLD RED using the example above which uses Microsoft Office 365 for email:
- v=spf1 include:spf.protection.outlook.com include:infusionmail.com -all
- The added include:infusionmail.com entry adds all Keap Email Servers that will be sending mail on your behalf
- Save the DNS TXT record
- DNS changes can take up to 48 hours to be noticed by all the DNS servers on the Internet, so you may have to wait a bit for the changes to take effect.
- Open a web browser to https://mxtoolbox.com/spf.aspx and fill in your business' DNS domain (e.g. simplegrowthsystems.com for us) and press the [SPF Record Lookup] button
Next, you will need to set up DKIM as an additional way to keep your emails out of the Junk/SPAM folder.
SETTING UP DKIM
- In Keap, go to Settings->Domains and look for your Email Domain
- It should look like this:
- Ignore the simplegrowthsystems.com and wagonerresearch.com domains - Keap will only be sending email to your contacts with a From: address from your domain
- Click on the blue Set up email domain button for your domain (see circled example above)
- Select your Domain host/provider if listed or Other if not
- Click on the blue Continue button
- Instructions and information will be provided:

- In a new tab/window, login to the management pages for your business' DNS domain
- Follow the instructions outlined in the Keap tab/window to add a DKIM record to your DNS
- You will create a CNAME Record with Keap's info in the Name/Host field and dkim.infusionmail.com in the Value/Points to field.
- Save the DNS CNAME record
- DNS changes can take up to 48 hours to be noticed by all the DNS servers on the Internet, so you may have to wait a bit for the changes to take effect.
That's it! Setting up SPF and DKIM will improve the deliverability of emails sent from Keap on your behalf.
Comments
0 comments
Article is closed for comments.